Exotica Trigger Validation Tutorial
General Idea
The trigger validation is based on FullSim RelVal samples produced centrally for every campaign. The idea is to compare some monitor elements for the exotica trigger path in a given trigger menu. The comparison of one release is done, category by category, with respect to the efficiency of the previous validated release. There are 27 categories grouping triggers with similar features, as defined in the slides linked hereTechnical Details
Each category corresponds to a CMSSW configure file, localized in following folder: https://github.com/cms-sw/cmssw/tree/master/HLTriggerOffline/Exotica/python/analyses It is duty of the validator to keep these configures updated according to the latest trigger menu. Every time a new trigger path is added to the menu, the validator has to include the path in the most suitable category. Usually these requests are accompanied by a JIRA ticket opened by the developers of the trigger path. For each CMSSW release, this RelVal sample is generated and the trigger analysis code is run centrally. The plots are them acessible on the DQM Offline system at the CMSWeb platform, as well as in the RelMon platform. Links and details on how to access will be shown in the step-by-step of a validation below.Validation step-by-step
1. Check the available and the previous validated releases
This can be done by checking the ValDB website: https://cms-pdmv.cern.ch/valdb/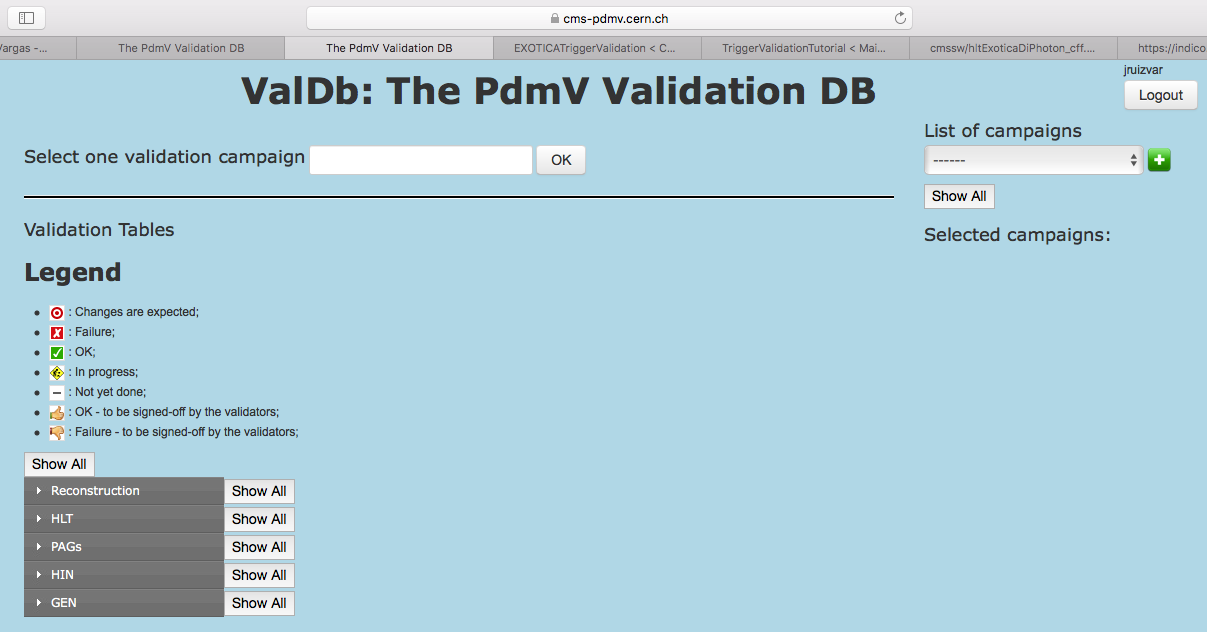 To check a list of related releases, write part of the name in the "Select one release" box. For instance, for releases of the family 9_1_X, write 9_1. The website will then warn you how many releases match this search criteria:
 The releases to be shown will then appear in the "List of releases" item. To select all, just click on "Show all". All selected releases will then be shown in the list in the right column of the website:
 The status of each of the trigger validation can be seen if HLT -> FullSim is selected in the gray menu in the bottom right of the page. The legend shows what each symbol means. This is where we can see which of the CMSSW releases still need validation (in this screenshot example, 9_1_0_pre1).

2. Check plots on RelMon
Click on the RelMon box in ValDB (note you need your certificate installed in the browser). Alternatively access directly through the link below: https://cms-pdmv.cern.ch/relmon/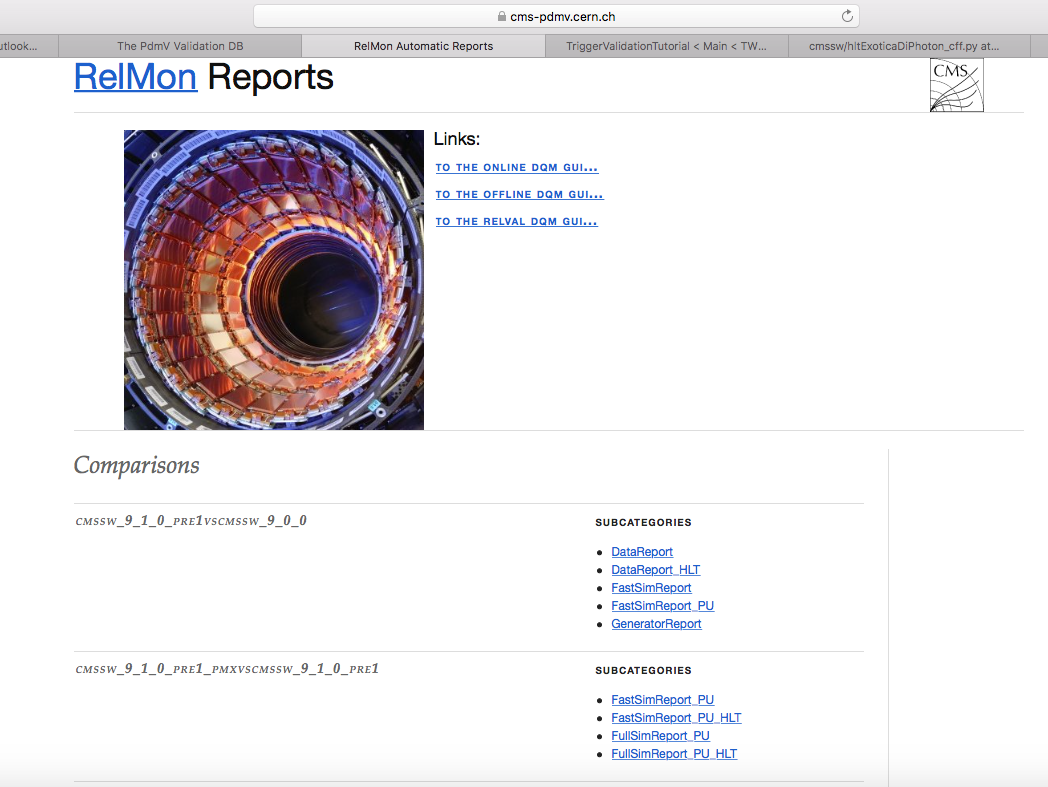 Scroll down and localize the subcategory FullSimReport_HLT in the comparison cmssw_9_1_0_pre1_2017vscmssw_9_0_0_2017
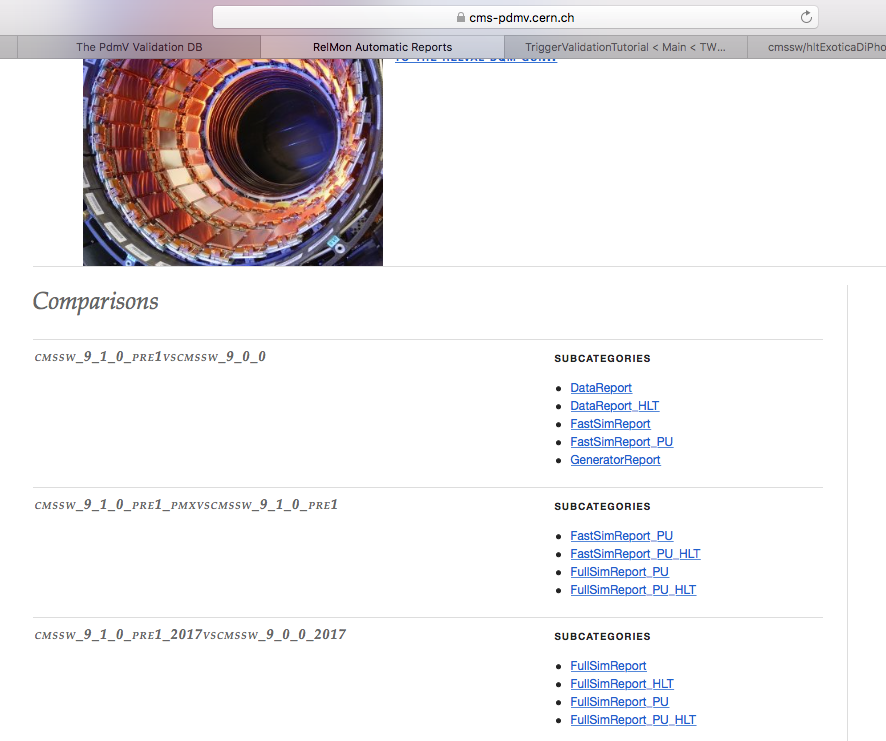 Click on the subcategory FullSimReport_HLT
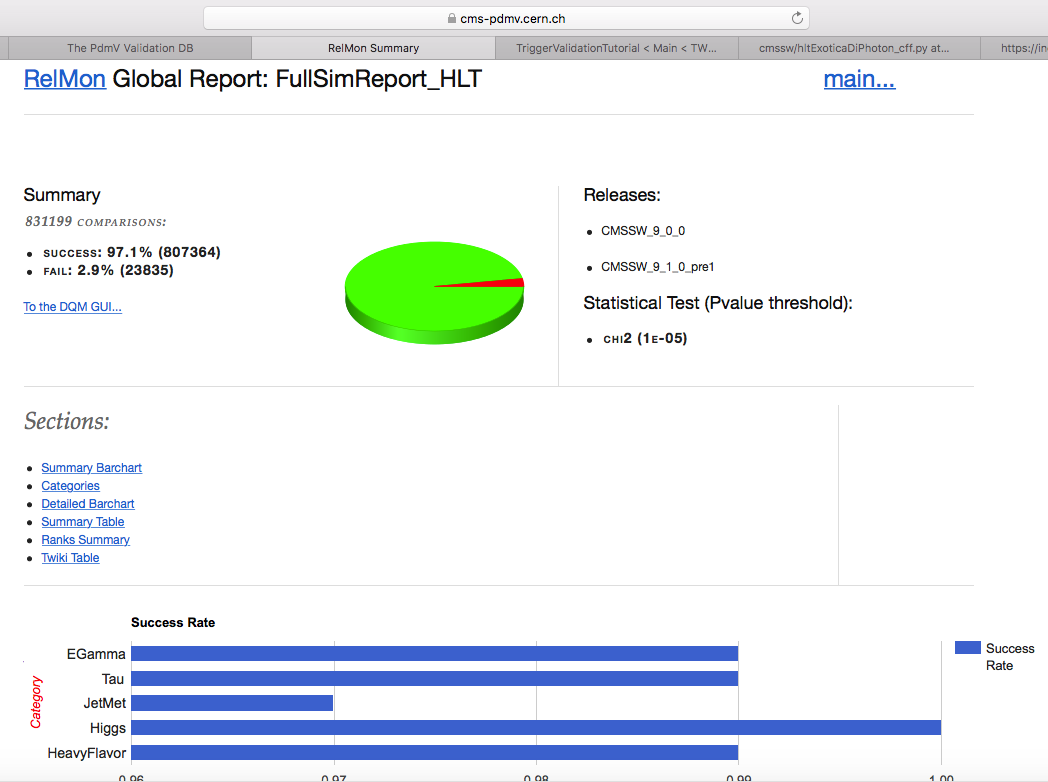 Scroll down and localize the Exotica pie charts in summary table
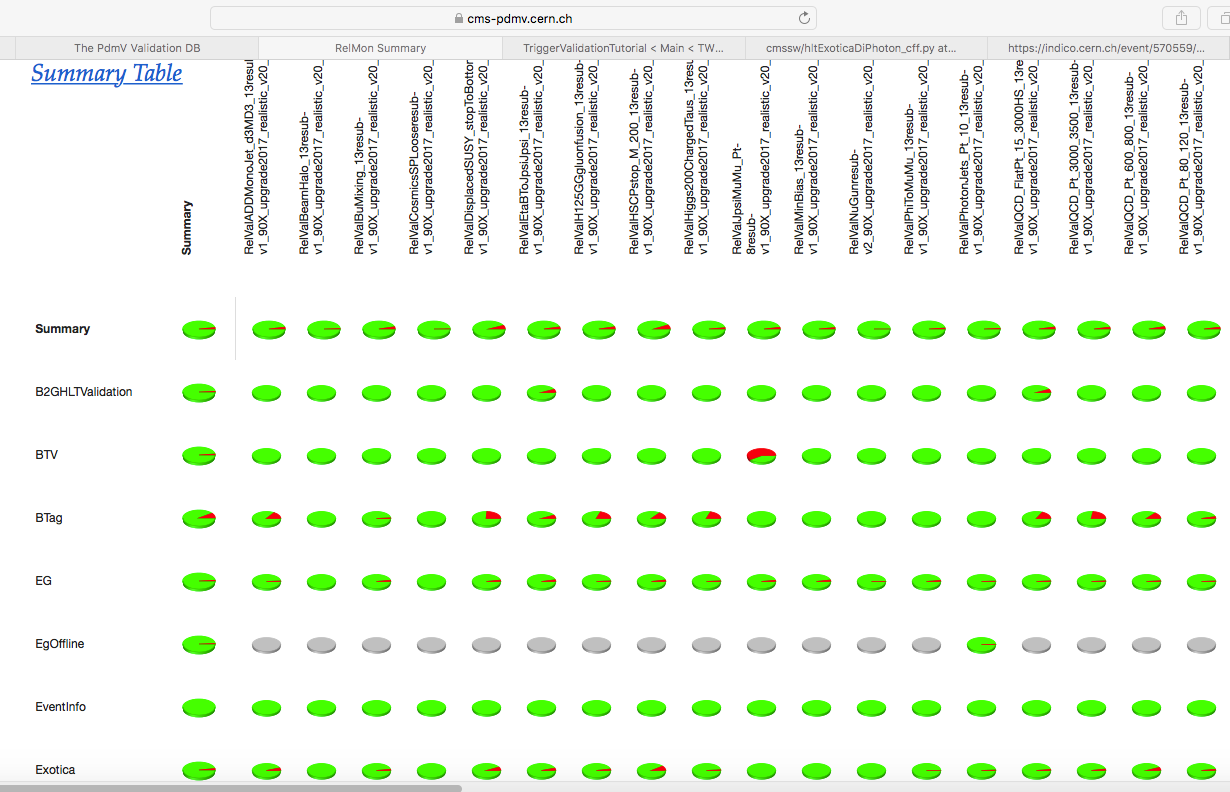 Click on the pie chart under the RelValADDMonoJet sample
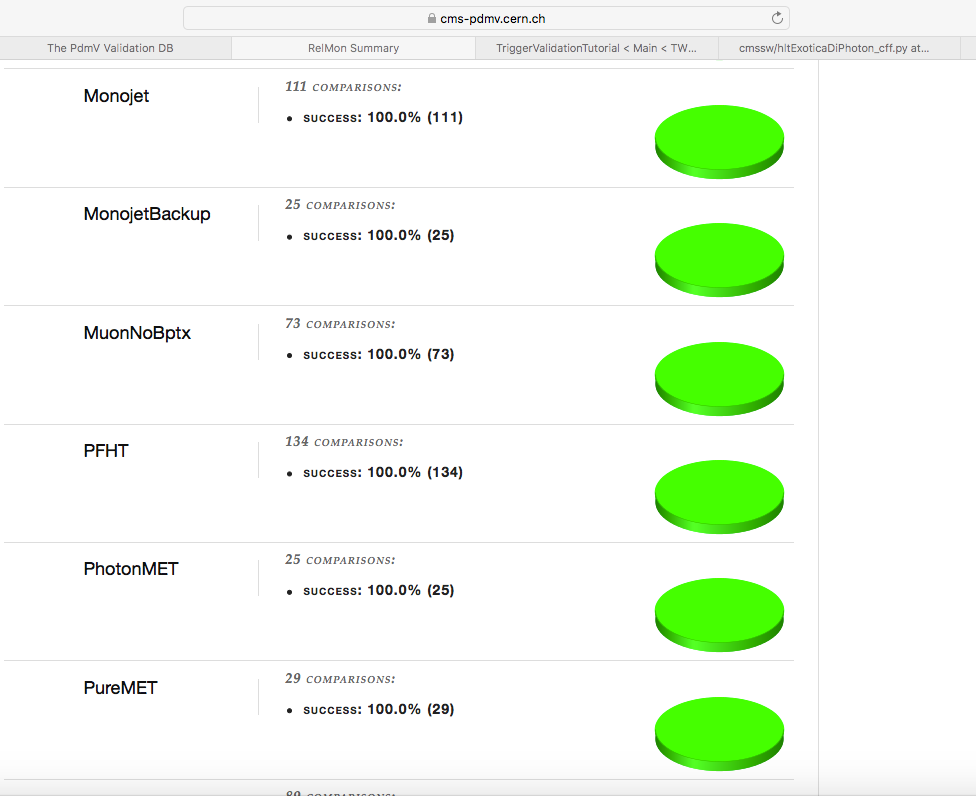
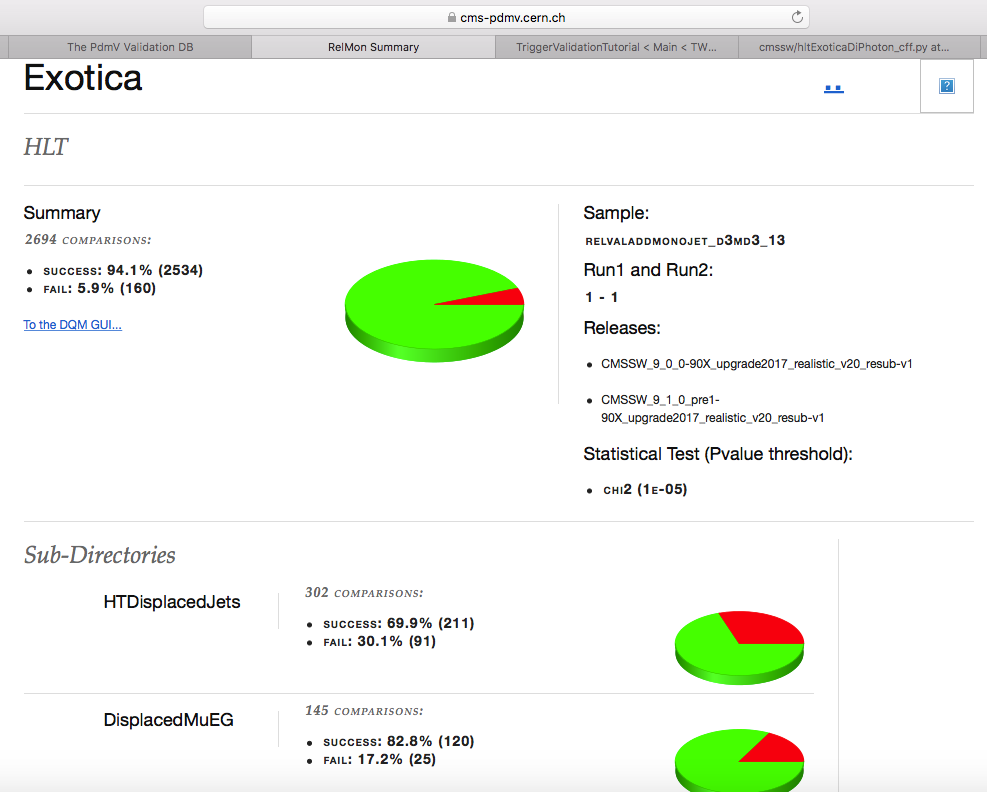 Scroll down and localize the sub-directory Monojet
 Click on the pie chart and visualize the monitor elements
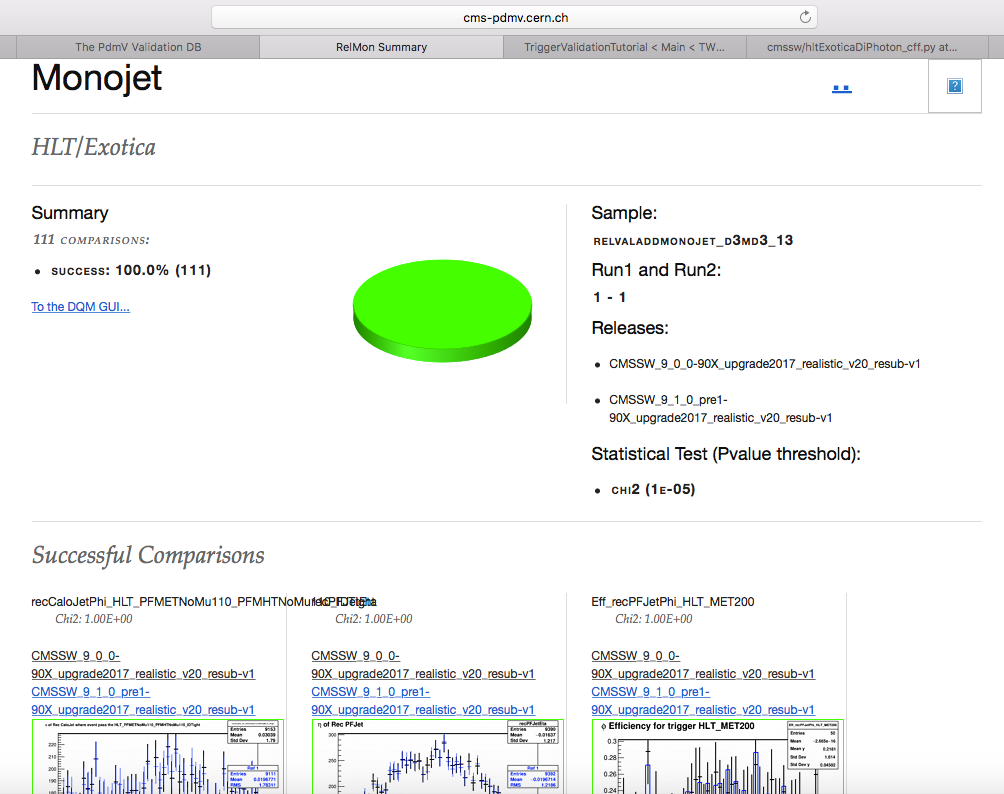 The procedure above is repeated for each category. Then, all the results have to be reported. This is done once more in the ValDB website.
ValDB report
Once more, enter the ValDB website. Click on the square corresponding to the CMSSW release to be validated, in the column of "Exotica". A new window will appear: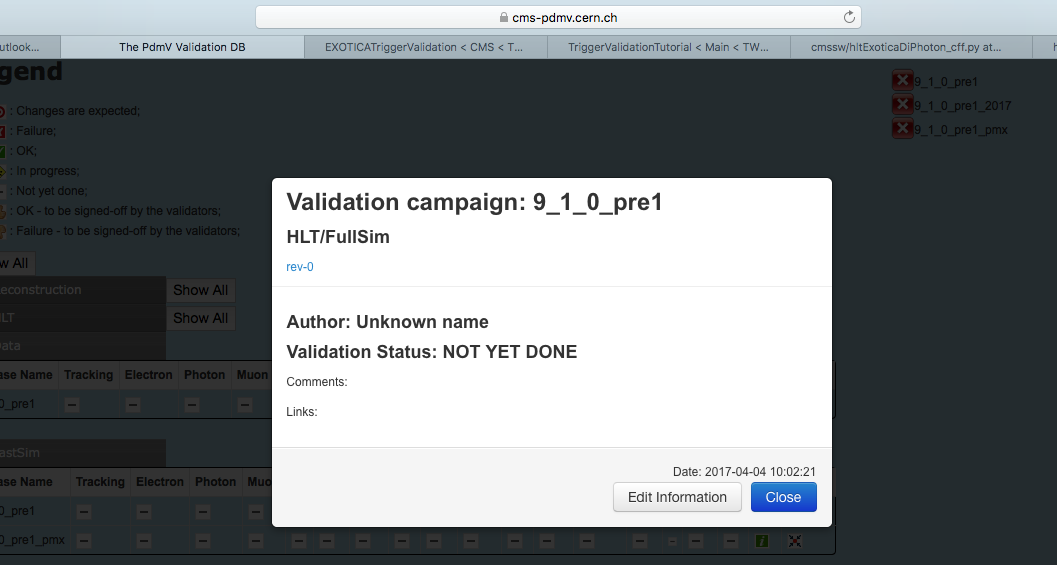 Click on "Edit Information". Change the "Exotica Validation Status" to the proper value. If nothing is wrong to be reported, "OK". If something is wrong and needs attention, "Failure", and explain why next. In the field "Comments", you say if the trigger menu is the same or if the number of triggers changed, and if it did, how it changed (this is part of the output from the trigger script). In the field "Links", you paste the link to RelMon which you have obtained before, for every category. This window looks like:
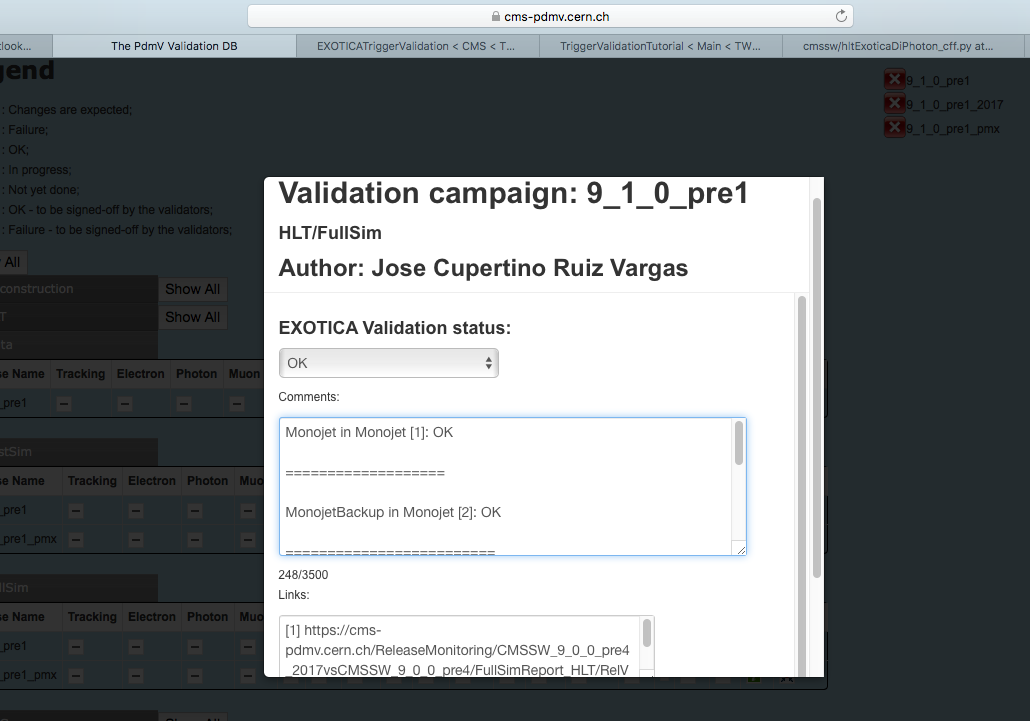 You click on "Save Information" and an automated email will warn the appropriate mailing lists that this relase has been validated, and what is the result of this validation.
The Exotica trigger validation is now done. Move to the next not validated release, and repeat all the procedure.
 | I | Attachment | History | Action | Size | Date | Who | Comment |
|---|---|---|---|---|---|---|---|
| |
EXO_900.txt | r1 | manage | 4.9 K | 2017-04-05 - 20:00 | UnknownUser | |
| |
relmon.png | r1 | manage | 344.1 K | 2017-04-05 - 15:58 | UnknownUser | |
| |
relmon1.png | r1 | manage | 266.2 K | 2017-04-05 - 15:59 | UnknownUser | |
| |
relmon2.png | r1 | manage | 108.7 K | 2017-04-05 - 15:59 | UnknownUser | |
| |
relmon3.png | r1 | manage | 160.3 K | 2017-04-05 - 15:59 | UnknownUser | |
| |
relmon4.png | r1 | manage | 125.8 K | 2017-04-05 - 16:00 | UnknownUser | |
| |
relmon5.png | r1 | manage | 105.0 K | 2017-04-05 - 16:00 | UnknownUser | |
| |
relmon6.png | r1 | manage | 169.1 K | 2017-04-05 - 16:00 | UnknownUser | |
| |
valdb1.png | r2 r1 | manage | 105.7 K | 2017-04-05 - 15:40 | UnknownUser | |
| |
valdb2.png | r3 r2 r1 | manage | 113.1 K | 2017-04-05 - 15:44 | UnknownUser | |
| |
valdb3.png | r2 r1 | manage | 76.4 K | 2017-04-05 - 15:41 | UnknownUser | |
| |
valdb4.png | r2 r1 | manage | 103.5 K | 2017-04-05 - 15:41 | UnknownUser | |
| |
valdbreport.png | r2 r1 | manage | 102.8 K | 2017-04-05 - 15:41 | UnknownUser | |
| |
valdbreport2.png | r2 r1 | manage | 131.5 K | 2017-04-05 - 15:41 | UnknownUser |
Ideas, requests, problems regarding TWiki? Send feedback


